Showing posts with label photo. Show all posts

Sunday, August 7, 2011

How to Manage an Effective FACEBOOK Page

As I’m sure you’ve noticed, just about every business has a Facebook Page.  Businesses don’t have a page just because it’s the popular thing to do; it’s a way of getting into the world of your potential customers.  A Facebook Page centralizes quick links to your main website and contact info, it showcases desired photos, and can even connect customers who can share personal stories of success with your product.  Best of all – it’s free!
All you need is a little bit of time to set up the page and then spend a few minutes a few times a week to check how things are going.

Facebook Page Set-Up

If you want a Facebook Page, but don’t have one yet, here is a great link specifically for Etsy Sellers.  Be sure to set up your “MyEtsy” section.  Here’s what mine looks like:
my etsy on facebook
Click Image to Enlarge
The MyEtsy application shows your banner with your shop items.  If they click on an item, it will take them directly to the item’s listing in your shop at Etsy.  Also, if a page visitor clicks on “Share,” then their Facebook post will include a link to the same item’s listing at Etsy.  Handy, don’t you think?
When you have at least 25 fans, you can get a shortened link address.  This makes it much easier to share your site address.  When logged into Facebook, go to http://www.facebook.com/username.  Select the Page that you are giving a username.  If you click “Check Availability,” it will automatically assume you want it if it’s available, so be sure to pick something you like and can easily remember.

Regular Check-Ups

Now you’ve got a page. 
Here are some tips of what to post and how to encourage visits and comments on your page.
  • Post Lots of Links
    • Etsy Treasuries (featuring you, one’s you like, some you’ve made, etc.)
    • Blog posts (if you keep a blog, this is a great way to announce that you’ve posted something new!)
    • Blog features (include links when other blogs are featuring your shop)
    • New Items in your shop
    • New shops (promote friends, family and fellow-sellers!) – tag their Facebook Page in your post by using the “@” symbol just before their page name
post links
Click Image to Enlarge
  • Showcase “1000 Words” (Photos) – Pictures are a great way to get people to look!  For most people, it seems to be easier to process photos than reading words.
    • New items
    • New logos
    • Current Items (sometimes posting a photo of an item that’s been sitting in the shop can give it new activity.  Better yet, post a new photo of the same item)
    • Plans – sometimes you can spark interest by sharing a photo (just give them a hint, not the whole plan!) of something you’ve got in the works
photos
Click Image to Enlarge
  • Be a Person, Be Personable
    • Respond to comments left on your page in a timely manner. 
      • To quickly check if anyone has made a comment, click on “Notifications” in the menu on the right side of the page. 
      • If there is anything new, there will be a number (how many notifications you have waiting) that will be floating at the end of the word “Notifications”
    • Be friendly
      • The Etsy world gives us a unique opportunity to give personalized customer service even to people across the world
      • Show that you care about them as a person as well as a potential customer
    • Share Success
      • Ask select customers if they wouldn’t mind taking a photo of the item they purchased from you and linking it to your page.
      • They can also share by uploading a photo to your page
be a person
Click Image to Enlarge


Those are the three main things that I do to keep my page engaging.  I’d love to get more ideas!  If you do something on your Facebook Page that works, please leave a comment and share with our readers!


......................................................................................................
.......................................................................................................

Wednesday, July 14, 2010

How-To Wednesday


I've been keepin my eye open for more photo hints - many of us have various types of products, so this suggestion is for smaller items. I believe, however, that these ideas can be applied to bigger items (like a full woman's outfit, etc). But it is catered to work for smaller objects. So pay attention, because this advice is great for:~Jewelry
~Purses/Bags (handbags, pencil pouches, wristlets)
~Small articles of clothing (baby clothes, shoes, gloves)~Small objects (camera, stuffed animal, seashells)~Soap, candles~Accesories (watches, headbands, hair flowers)and the list goes on. I think this advice works for most of our shops, and can be helpful for many of our items. I'm thinking about going out and buying and Ott Bulb!!
Here are some hints from Bomobob on taking photos indoors. Especially when the weather outside isn't condusive to photographing! You can find the full forum entry here. I'll quote and include some of his photos, but I'd also recommend reading his words!
He says rather than buying a "Lightbox," a

"piece of cardboard and light bulb have always served me just fine. Here’s what I call my 50 cent lightbox:"
Doesn't look too expensive... Just a nice piece of poster board or cardstock. He tapes it to the wall and the floor to hold it in place. He said that the weather was dreary outside; making it perfect for his makeshift Lightbox.

Next, he says,

"Yup, a sheet of Bristol board taped to the floor and wall. And today was a perfect day to demonstrate; cold, cloudy, blustery, and quite dark. What you see there is what you get. Not very good light. Big deal.
"Enter the light bulb, or to be precise, the Ott bulb. These are cheap, easily available at hardware stores, and the best lighting invention since sliced bread. Even better in fact, since sliced bread has very little to do with photography.
Take one table lamp, remove shade, screw in Ott bulb, and put on stairs. What a difference!"
He also compensated for the darkness by changing the F-stop exposure on his camera. If you don't know how to this on your camera, you can take care of it after the fact, in a Photo Editor, like Google's Picasa (which is free - so affordable!), or Adobe Photoshop. **In Picasa, you would adjust the light-exposure by clicking on the Tuning tab, and increasing Fill Light and Highlights.**

Here's a sample of how he used his easy-peasy light box:

Isn't that camera look stunning? On this photo, he used the Macro setting, which looks like a flower. Here's someone's close-up of their macro button on their camera:Macro allows your camera to focus up-close and to allow the background to blur a little. You can increase the amount of blur in your photo editor. ** In Picasa, you can select Soft Focus under the Effects tab. It's not the most fancy way to blur out the background, but for some pictures it's the perfect touch.**


Another Etsy Storque article (part 2 of the article I shared last week, I believe), shows some great images that may inspire you on new, exciting ways to present your items. Remember to avoid using flash, as Janae said, using flash is a great way to murder your photos.

Here are some more great ones from our own team! Thanks for presenting your images so beautifully! These are the kinds of photos that work for Etsy's Treasuries and Front Page and Storque articles:


Wednesday, July 7, 2010

Photo Focus

How is the best way to use your 5 photos-per-item in your Etsy shop?


Focus your first picture on the item itself, or (depending on the type of item) get a close-up on a detail of the item. Etsy's administrative team, buyers, and sellers love for this picture to be stunning, ethereal, and compelling.


The easiest way to get good lighting on a tight budget or limited resources is to be out on a sunny day. However, having the item in direct sunlight will over-expose its color, so find a spot with sufficient light, but in the shade. I don't recommend the shade of a tree, though, because trees let little bits of sunshine through that make it hard for a camera to focus. Just find a spot outdoors in shade and click-away!


If you are running into the problem of cloudy days, rainy days, etc., Etsy has suggestions on taking photos in other conditions here (
“I prefer to photograph outside, but it’s often too dark or raining. Help!” Low-light or dull days don’t have to equal dull photographs. Excellent photography doesn't have to be bright.).


The rest of your photos should show some detail, such as (depending on your type of product):
~Size
~Proportion
~Suggestions for use
~Customizing ideas or options
~Other angles or views (ie: inside of a purse)


The Princeton by Cherry Blossoms


Depending on the item, you may have a few picture slots leftover. At this point, it's customary to use a Team Badge. Members of the LDS Members of Etsy have a Team Badge, which can be copied from the image below. Save it to your hard drive and upload it to your pictures. It a great way to network, advertise your fellow team members, and/or just show that you're involve in Etsy communities.

Thursday, July 1, 2010

Photograph Pointers

An email with articles was sent to me from Etsy today - It has *GREAT* advice on getting the best image across for your items' photos. Click Here to see what it says.

First, a few things from me: Photographing can be a daunting task, especially when we know that the photos have a huge influence on whether a potential customer checks out the item, or even decides to buy it. Images speak louder than words; that makes them even more important than a well written description to get someone to "enter the door" to your shop. No pressure!! :P

On Etsy (or any other online shop, for that matter) image is a small thumbnail mixed with many other images. You definitely want your image to stand out! Remember, not everything needs to be show in the first picture - it just needs to be enough to get them into your shop. You have 4 other pictures to help give more detail if they are interested in a purchase!
Here are some of my favorite "awesome photos" (shown in thumbnail size) from our fellow team members! I'll tell you why I like them:


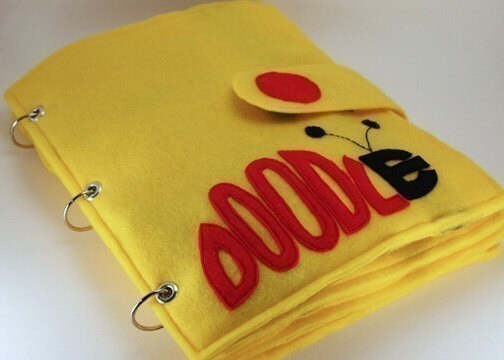
Doodlebug - ePattern for a Portable Art Book from CopyCrafts shows the item at a cool angle. You can read Doodle really well and it just makes me want to see more.

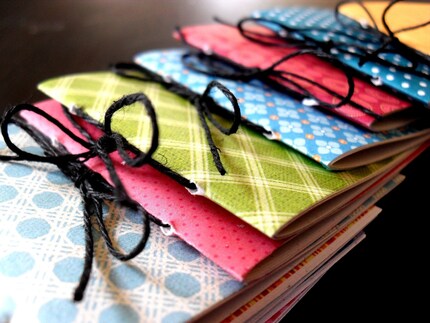
25 Assorted Party Favors from CinderLisa Design are SO different from the background - the little books really pop! They look absolutely beautiful, they are very well presented.
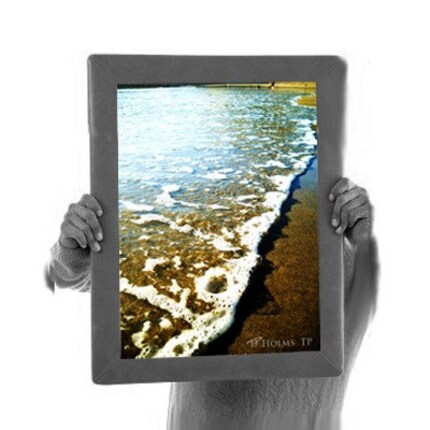
Warm Surf by HolmesTP is incredible! I know he's closing his shop, but this guy presents his photos so well in a photo! It's cool that the item for sale is in color, and the rest is gray or bright white.

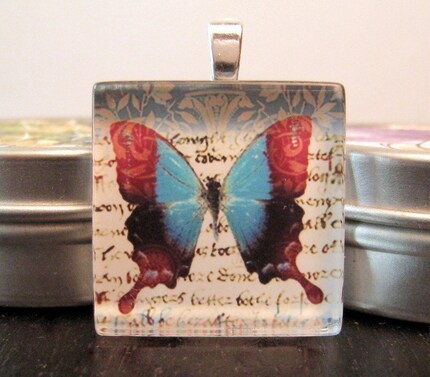
Red and Blue Butterfly on Writing for sale at My Daisy Dreams is in front of other items, but they aren't distracting. You're shown a beautiful butterfly, and it makes you want to see what's written behind it.

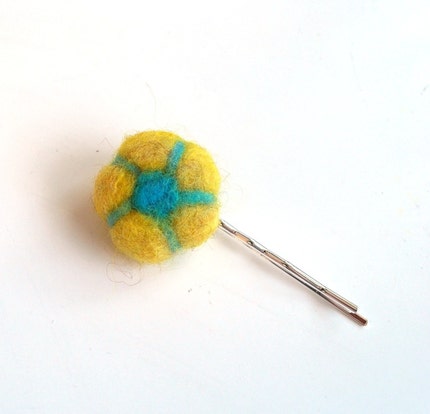
Lily - Felted Flower Bobby Pin by ShellAnne's Splendor is great! This tiny item is bright and colorful, which is great against the white background. A white background keeps it playful - if she'd chosen a black background, it would seem too serious, and anything with color or a pattern would have detracted from the flower itself.

Well, I hope that helps for those of you who have wanted some pointers of what works! Let me know if you have more questions, or want to get more advice on presenting your items in their best way!